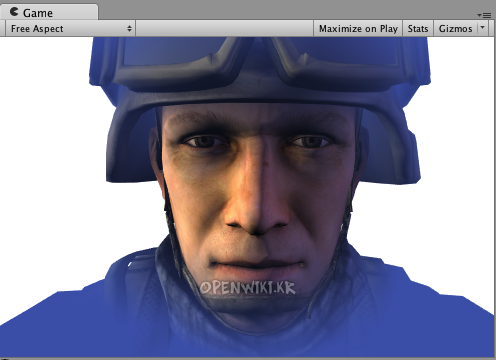
목차
Surface Shader Examples
여기에 ''Surface Shaders''의 몇몇 예들이 있습니다. 아래 예들은 내장된 조명 모델을 사용하는 것에 초점을 맞추고 있습니다; 사용자 저의 조명 모델을 구현하는 방법에 대한 예들은 Surface Shader Lighting Examples에 있습니다.
Simple
우리는 매우 간단한 쉐이더와 함께 시작할 것이고 그것을 구축할 것입니다. 표면 색상을 "white"로 세팅하는 쉐이더가 있습니다. 그것은 내장된Lambert (diffuse) 조명 모델을 사용합니다.
Shader "Example/Diffuse Simple" {
  SubShader {
    Tags { "RenderType" = "Opaque" }
    CGPROGRAM
    #pragma surface surf Lambert
    struct Input {
        float4 color : COLOR;
    };
    void surf (Input IN, inout SurfaceOutput o) {
        o.Albedo = 1;
    }
    ENDCG
  }
  Fallback "Diffuse"
}
여기에 두 개의 lights 셋업을 가지는 모델 위에서 어떻게 보이는지 있습니다: {{:unity3d:SurfaceShaderSimple.png}} =====Texture===== 흰색으로만 된 물체를 꽤 지루해서 하나의 텍스쳐를 추가합니다. 우리는 쉐이더에 [[SL-Properties|Properties block를 추가할 것이어서 우리는 우리의 재료에서 텍스쳐 셀렉터를 얻습니다. 다른 변화들은 아래 굵은 글씨로 되어 있습니다.
Shader "Example/Diffuse Texture" {
  _Properties {_
    __MainTex ("Texture", 2D) = "white" {}_
  _}_
  SubShader {
    Tags { "RenderType" = "Opaque" }
    CGPROGRAM
    #pragma surface surf Lambert
    struct Input {
        _float2 uv_MainTex;_
    };
    _sampler2D _MainTex;_
    void surf (Input IN, inout SurfaceOutput o) {
        o.Albedo = _tex2D (_MainTex, IN.uv_MainTex).rgb_;
    }
    ENDCG
  }
  Fallback "Diffuse"
}
Normal mapping
몇몇 normal 매핑을 추가합니다:
Shader "Example/Diffuse Bump" {
  Properties {
    _MainTex ("Texture", 2D) = "white" {}
    __BumpMap ("Bumpmap", 2D) = "bump" {}_
  }
  SubShader {
    Tags { "RenderType" = "Opaque" }
    CGPROGRAM
    #pragma surface surf Lambert
    struct Input {
      float2 uv_MainTex;
      float2 uv_BumpMap;
    };
    sampler2D _MainTex;
    _sampler2D _BumpMap;_
    void surf (Input IN, inout SurfaceOutput o) {
      o.Albedo = tex2D (_MainTex, IN.uv_MainTex).rgb;
      _o.Normal = UnpackNormal (tex2D (_BumpMap, IN.uv_BumpMap));_
    }
    ENDCG
  }
  Fallback "Diffuse"
}
Rim Lighting
지금 물체의 모서리를 하이라이트하기 위해서 몇몇Rim Lighting을 추가해 보겠습니다. 우리는 표면 normal과 뷰 방향 사이의 각도에 기반한 발산하는 조명을 추가할 것입니다. 그것을 위해서 우리는 viewDir 내장 표면 쉐이더 변수를 사용할 것입니다.
Shader "Example/Rim" {
  Properties {
    _MainTex ("Texture", 2D) = "white" {}
    _BumpMap ("Bumpmap", 2D) = "bump" {}
    __RimColor ("Rim Color", Color) = (0.26,0.19,0.16,0.0)_
    __RimPower ("Rim Power", Range(0.5,8.0)) = 3.0_
  }
  SubShader {
    Tags { "RenderType" = "Opaque" }
    CGPROGRAM
    #pragma surface surf Lambert
    struct Input {
        float2 uv_MainTex;
        float2 uv_BumpMap;
        _float3 viewDir;_
    };
    sampler2D _MainTex;
    sampler2D _BumpMap;
    _float4 _RimColor;_
    _float _RimPower;_
    void surf (Input IN, inout SurfaceOutput o) {
        o.Albedo = tex2D (_MainTex, IN.uv_MainTex).rgb;
        o.Normal = UnpackNormal (tex2D (_BumpMap, IN.uv_BumpMap));
        _half rim = 1.0 - saturate(dot (normalize(IN.viewDir), o.Normal));_
        _o.Emission = _RimColor.rgb * pow (rim, _RimPower);_
    }
    ENDCG
  }
  Fallback "Diffuse"
}
Detail Texture
다른 효과를 위해서 기본 텍스쳐와 결합된 디테일 텍스쳐를 추가합니다. 디테일 텍스쳐는 같은UVs를 사용하나Material에서 보통 다른Tiling을 사용합니다. 그래서 우리는 다른 입력UV 좌표를 사용해야만 합니다.
Shader "Example/Detail" {
  Properties {
    _MainTex ("Texture", 2D) = "white" {}
    _BumpMap ("Bumpmap", 2D) = "bump" {}
    __Detail ("Detail", 2D) = "gray" {}_
  }
  SubShader {
    Tags { "RenderType" = "Opaque" }
    CGPROGRAM
    #pragma surface surf Lambert
    struct Input {
        float2 uv_MainTex;
        float2 uv_BumpMap;
        _float2 uv_Detail;_
    };
    sampler2D _MainTex;
    sampler2D _BumpMap;
    _sampler2D _Detail;_
    void surf (Input IN, inout SurfaceOutput o) {
        o.Albedo = tex2D (_MainTex, IN.uv_MainTex).rgb;
        _o.Albedo *= tex2D (_Detail, IN.uv_Detail).rgb * 2;_
        o.Normal = UnpackNormal (tex2D (_BumpMap, IN.uv_BumpMap));
    }
    ENDCG
  }
  Fallback "Diffuse"
}
Detail Texture in Screen Space
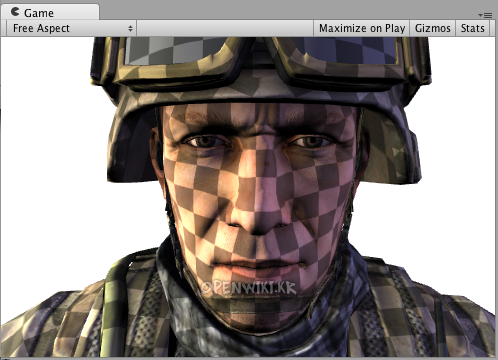
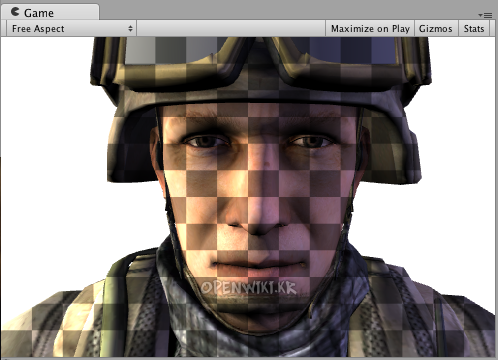
스크린 공간에서 디테일 텍스쳐는 어떻습니까? 군인 머리 모델을 위해서 많이 말이 되지는 않지만 내장된 screenPos 입력값이 어떻게 사용되는지 설명합니다:
Shader "Example/ScreenPos" {
  Properties {
    _MainTex ("Texture", 2D) = "white" {}
    _Detail ("Detail", 2D) = "gray" {}
  }
  SubShader {
    Tags { "RenderType" = "Opaque" }
    CGPROGRAM
    #pragma surface surf Lambert
    struct Input {
        float2 uv_MainTex;
        _float4 screenPos;_
    };
    sampler2D _MainTex;
    sampler2D _Detail;
    void surf (Input IN, inout SurfaceOutput o) {
        o.Albedo = tex2D (_MainTex, IN.uv_MainTex).rgb;
        _float2 screenUV = IN.screenPos.xy / IN.screenPos.w;_
        _screenUV *= float2(8,6);_
        _o.Albedo *= tex2D (_Detail, screenUV).rgb * 2;_
    }
    ENDCG
  }
  Fallback "Diffuse"
}
Cubemap Reflection
여기에 내장된 worldRefl 입력값을 사용해서cubemapped 반사를 하는 쉐이더가 있습니다. 그것은 실제로 내장된Reflective/Diffuse 쉐이더와 매우 비슷합니다:
Shader "Example/WorldRefl" {
  Properties {
    _MainTex ("Texture", 2D) = "white" {}
    __Cube ("Cubemap", CUBE) = "" {}_
  }
  SubShader {
    Tags { "RenderType" = "Opaque" }
    CGPROGRAM
    #pragma surface surf Lambert
    struct Input {
        float2 uv_MainTex;
        _float3 worldRefl;_
    };
    sampler2D _MainTex;
    _samplerCUBE _Cube;_
    void surf (Input IN, inout SurfaceOutput o) {
        o.Albedo = tex2D (_MainTex, IN.uv_MainTex).rgb * 0.5;
        _o.Emission = texCUBE (_Cube, IN.worldRefl).rgb;_
    }
    ENDCG
  }
  Fallback "Diffuse"
}
그리고Emission로서 반사색을 지정한 이래로 우리는 매우 빛나는 군인을 얻을 수 있습니다:
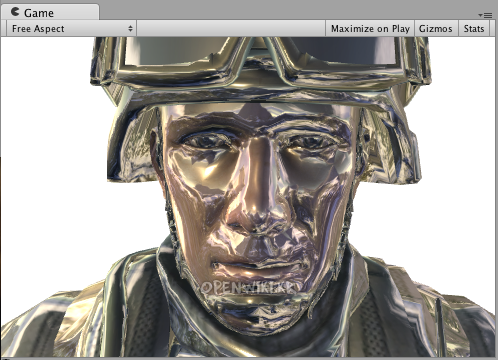
사용자가 normal maps에 의해서 영향을 받는 반사를 하기 원한다면 그것은 약간 참여할 필요가 있습니다: INTERNAL_DATA 는 입력 구조 그리고 사용자가 Normal 결과에 쓰여진 후에 픽셀당 반사 벡터를 계산하기 위해 사용되는 WorldReflectionVector 함수로 추가될 필요가 있습니다.
Shader "Example/WorldRefl Normalmap" {
  Properties {
    _MainTex ("Texture", 2D) = "white" {}
    _BumpMap ("Bumpmap", 2D) = "bump" {}
    _Cube ("Cubemap", CUBE) = "" {}
  }
  SubShader {
    Tags { "RenderType" = "Opaque" }
    CGPROGRAM
    #pragma surface surf Lambert
    struct Input {
        float2 uv_MainTex;
        float2 uv_BumpMap;
        float3 worldRefl;
        _INTERNAL_DATA_
    };
    sampler2D _MainTex;
    sampler2D _BumpMap;
    samplerCUBE _Cube;
    void surf (Input IN, inout SurfaceOutput o) {
        o.Albedo = tex2D (_MainTex, IN.uv_MainTex).rgb * 0.5;
        o.Normal = UnpackNormal (tex2D (_BumpMap, IN.uv_BumpMap));
        o.Emission = texCUBE (_Cube, _WorldReflectionVector (IN, o.Normal)_).rgb;
    }
    ENDCG
  }
  Fallback "Diffuse"
}
Slices via World Space Position
여기는 가까운 수평의 링에 픽셀들을 제거함에 의해 물체를 자르는 쉐이더 입니다. 그것은 픽셀의 세계 포지션에 기반한clip() Cg/HLSL 함수를 사용하는 것에 의해 저것을 합니다. 우리는 worldPos 내장된 표면 쉐이더 변수를 사용할 것입니다.
Shader "Example/Slices" {
  Properties {
    _MainTex ("Texture", 2D) = "white" {}
    _BumpMap ("Bumpmap", 2D) = "bump" {}
  }
  SubShader {
    Tags { "RenderType" = "Opaque" }
    _Cull Off_
    CGPROGRAM
    #pragma surface surf Lambert
    struct Input {
        float2 uv_MainTex;
        float2 uv_BumpMap;
        _float3 worldPos;_
    };
    sampler2D _MainTex;
    sampler2D _BumpMap;
    void surf (Input IN, inout SurfaceOutput o) {
        _clip (frac((IN.worldPos.y+IN.worldPos.z*0.1) * 5) - 0.5);_
        o.Albedo = tex2D (_MainTex, IN.uv_MainTex).rgb;
        o.Normal = UnpackNormal (tex2D (_BumpMap, IN.uv_BumpMap));
    }
    ENDCG
  }
  Fallback "Diffuse"
}
Normal Extrusion with Vertex Modifier
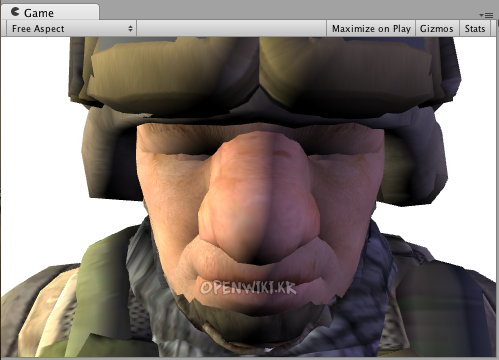
정점 쉐이더에서 들어오는 꼭지점 데이터를 변경할 정점 변경 함수를 사용하는 것이 가능합니다. 이것은 프로시저 애니메이션, normals를 따르는 밀어냄등을 위해 사용될 수 있습니다. 표면 쉐이더 컴파일 지시어 vertex:functionName가 inout appdata_full 파라미터를 취하는 하나의 함수를 가지고 저것을 위해서 사용됩니다.
재료에서 지정된 만큼 그들의 normals을 따라서 꼭지점을 움직이는 쉐이더가 있습니다:
Shader "Example/Normal Extrusion" {
  Properties {
    _MainTex ("Texture", 2D) = "white" {}
    __Amount ("Extrusion Amount", Range(-1,1)) = 0.5_
  }
  SubShader {
    Tags { "RenderType" = "Opaque" }
    CGPROGRAM
    #pragma surface surf Lambert _vertex:vert_
    struct Input {
        float2 uv_MainTex;
    };
    _float _Amount;_
    _void vert (inout appdata_full v) {_
        _v.vertex.xyz += v.normal * _Amount;_
    _}_
    sampler2D _MainTex;
    void surf (Input IN, inout SurfaceOutput o) {
        o.Albedo = tex2D (_MainTex, IN.uv_MainTex).rgb;
    }
    ENDCG
  }
  Fallback "Diffuse"
}
Custom data computed per-vertex
꼭지점 변형 함수를 사용해서 꼭지점 쉐이더에서 사용자 정의 데이터를 계산하는 것 또한 가능합니다. 그것은 그 때 픽셀 당 표면 쉐이더 함수로 전달될 것입니다. 같은 컴파일 지시어 vertex:functionName가 사용되나 함수는 두 개의 파라미터를 취해야만 합니다: inout appdata_full와 out Input. 사용자는 거기에 내장된 값이 아닌 어떠한 입력 멤버를 채울 수 있습니다.
아래의 예는 사용자 정의 float3 customColor 멤버를 정의합니다. 그것은 꼭지점 함수에서 계산됩니다:
Shader "Example/Custom Vertex Data" {
  Properties {
    _MainTex ("Texture", 2D) = "white" {}
  }
  SubShader {
    Tags { "RenderType" = "Opaque" }
    CGPROGRAM
    #pragma surface surf Lambert _vertex:vert_
    struct Input {
        float2 uv_MainTex;
        _float3 customColor;_
    };
    void vert (inout appdata_full v, _out Input o_) {
        _o.customColor = abs(v.normal);_
    }
    sampler2D _MainTex;
    void surf (Input IN, inout SurfaceOutput o) {
        o.Albedo = tex2D (_MainTex, IN.uv_MainTex).rgb;
        _o.Albedo *= IN.customColor;_
    }
    ENDCG
  }
  Fallback "Diffuse"
}
이 예에서 customColor는 normal의 절대 값으로 세팅됩니다:

더욱 실용적인 사용은 내장된 입력 변수에 의해 제공되어지지 않는 어떠한 정점 당 데이터를 계산하고 있을 수 있습니다; 또는 쉐이더 계산을 최적화할 수 있습니다. 예를 들어 픽셀 당 표면 쉐이더에서 저것을 하는 것 대신에 물체의 꼭지점에서Rim 조명을 계산하는 것이 가능합니다.
Final Color Modifier
셰이더에 의해 계산된 final color를 수정하는 "final color modifier" 함수를 사용하는 것이 가능합니다. Surface shader compilation directive finalcolor:functionName 은 Input IN, SurfaceOutput o, inout fixed4 color parameters 를 가지는 함수와 함께 그것을 위해 사용되어 집니다.
여기에 마지막 색상에 엷은 색조 (tint)를 주는 간단한 셰이더가 있습니다. 이것은 surface Albedo color 에 틴트를 주는 것과는 다릅니다: 이 틴트는 라이트맵, 라이트프로브, 비슷한 외부 소스로부터 온 어떤 색상들에게도 영향을 끼칠 것입니다. Here's a simple shader that applies tint to final color. This is different from just applying tint to surface Albedo color: this tint will also affect any color that came from lightmaps, light probes and similar extra sources.
Shader "Example/Tint Final Color" {
  Properties {
    _MainTex ("Texture", 2D) = "white" {}
    __ColorTint ("Tint", Color) = (1.0, 0.6, 0.6, 1.0)_
  }
  SubShader {
    Tags { "RenderType" = "Opaque" }
    CGPROGRAM
    #pragma surface surf Lambert _finalcolor:mycolor_
    struct Input {
        float2 uv_MainTex;
    };
    _fixed4 _ColorTint;_
    _void mycolor (Input IN, SurfaceOutput o, inout fixed4 color)_
    {
        _color *= _ColorTint;_
    }
    sampler2D _MainTex;
    void surf (Input IN, inout SurfaceOutput o) {
         o.Albedo = tex2D (_MainTex, IN.uv_MainTex).rgb;
    }
    ENDCG
  }
  Fallback "Diffuse"
}
Custom Fog with Final Color Modifier
Final color modifier (위 참조) 의 일반적인 사용법은 완전히 커스텀 제작된 안개를 사용하는 것입니다. 안개는 final color modifier가 하는 일인 마지막으로 계산된 픽셀 쎼이더 색상 (final computed pixel shader color)에 영향을 주는 것이 필요합니다.
여기에 스크린 중심으로부터의 거리에 기반해서 안개에 엷은 색조(tint)를 주는 셰이더가 있습니다. 이것은 custom vertex data(안개)를 지닌 vertex modifier와 final color modifier를 합칩니다. forward rendering additive pass 에서 사용되는 경우, 안개는 검은 색상으로 색상이 바래게 됩니다. 이 예제는 이것을 잘 처리함과 동시에 UNITY_PASS_FORWARDADD 도 확인합니다.
Shader "Example/Fog via Final Color" {
  Properties {
    _MainTex ("Texture", 2D) = "white" {}
    __FogColor ("Fog Color", Color) = (0.3, 0.4, 0.7, 1.0)_
  }
  SubShader {
    Tags { "RenderType" = "Opaque" }
    CGPROGRAM
    #pragma surface surf Lambert _finalcolor:mycolor vertex:myvert_
    struct Input {
        float2 uv_MainTex;
        _half fog;_
    };
    void myvert (inout appdata_full v, out Input data)
    {
        _float4 hpos = mul (UNITY_MATRIX_MVP, v.vertex);_
        _data.fog = min (1, dot (hpos.xy, hpos.xy) * 0.1);_
    }
    fixed4 _FogColor;
    void mycolor (Input IN, SurfaceOutput o, inout fixed4 color)
    {
        _fixed3 fogColor = _FogColor.rgb;_
        _#ifdef UNITY_PASS_FORWARDADD_
        _fogColor = 0;_
        _#endif_
        _color.rgb = lerp (color.rgb, fogColor, IN.fog);_
    }
    sampler2D _MainTex;
    void surf (Input IN, inout SurfaceOutput o) {
         o.Albedo = tex2D (_MainTex, IN.uv_MainTex).rgb;
    }
    ENDCG
  }
  Fallback "Diffuse"
}
- 출처: 유니티코리아위키 (CC BY-NC-SA 2.0)


