Extending UnityGUI
사용자의 요구를 맞추기 위해UnityGUI를 활용하고 확장하는 여러가지 방법이 있습니다. 컨트롤은 믹스되어질 수 있고 생성되어질 수 있으며 사용자는 사용자의 입력이 어떻게 GUI로 프로세스되어 지는지를 명령하는 많은 활용을 가집니다.
Compound Controls
사용자의 GUI에서 두 가지 타입의 컨트롤이 항상 함께 나타나는 상황이 있을지도 모릅니다. 예를 들어 사용자는 다수의Horizontal Sliders과 함께 캐릭터 생성 스크린을 생성하고 있습니다. 모든 그러한 슬라이더들은 그것들을 식별하기 위한 레이블이 필요합니다. 그래서 플레이어는 그들이 적응하고 있는 것을 압니다. 이런 경우에 사용자는GUI.HorizontalSlider()로의 콜과 함께 GUI.Label()로의 모든 콜을 파트너할 수 있거나 또는 사용자는 레이블과 슬라이더를 함께 포함하는 Compound Control을 생성할 수 있습니다.
/* Label and Slider Compound Control */

var mySlider : float = 1.0;

function OnGUI () {
	mySlider = LabelSlider (Rect (10, 100, 100, 20), mySlider, 5.0, "Label text here");
}

function LabelSlider (screenRect : Rect, sliderValue : float, sliderMaxValue : float, labelText : String) : float {
	GUI.Label (screenRect, labelText);
	screenRect.x += screenRect.width; // <- Push the Slider to the end of the Label
	sliderValue = GUI.HorizontalSlider (screenRect, sliderValue, 0.0, sliderMaxValue);
	return sliderValue;
}
이런 예에서 LabelSlider()을 부르고 옳은 아규먼트를 패스하는 것은 수평의 슬라이더와 함게 짝지어진 레이블을 제공할 것입니다. Compund 컨트롤을 쓸 때 사용자는 그것을 상호작용하게 만드는 함수의 끝에서 올바른 값을 리턴하는 것을 기억해야만 합니다.
Static Compound Controls
Static 함수를 사용하는 것에 의해 사용자는 자신을 포함하는 사용자 자신의 Compond 컨트롤의 컬렉션 전체를 생성할 수 있습니다. 이런 방법에서 사용자는 사용자가 사용하기를 원하는 같은 스크립트에서 사용자의 함수를 선언하지 않아야 합니다.
/* This script is called CompoundControls */

static function LabelSlider (screenRect : Rect, sliderValue : float, sliderMaxValue : float, labelText : String) : float {
	GUI.Label (screenRect, labelText);
	screenRect.x += screenRect.width; // <- Push the Slider to the end of the Label
	sliderValue = GUI.HorizontalSlider (screenRect, sliderValue, 0.0, sliderMaxValue);
	return sliderValue;
}
CompoundControls라고 불리는 하나의 스크립트에서 위의 예제를 저장하는 것에 의해 사용자는어떠한 다른 스크립트로 부터 단순히 CompoundControls.LabelSlider()을 타이핑하는 것과 사용자의 아규먼트를 제공하는 것에 의해서 LabelSlider() 함수를 콜할 수 있습니다.
Elaborate Compound Controls
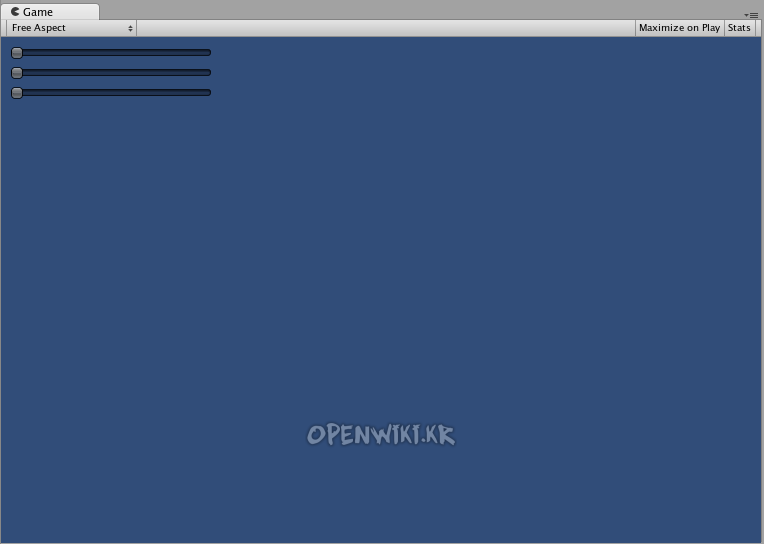
사용자는Compound 컨트롤과 함께 매우 생산적일 수 있습니다. 그들은 사용자가 원하는 방향으로 정렬되고 그룹되어질 수 있습니다. 다음의 예제는 재사용 가능한 RGB 슬라이더를 생성합니다.
/* RGB Slider Compound Control */

var myColor : Color;

function OnGUI () {
	myColor = RGBSlider (Rect (10,10,200,10), myColor);
}

function RGBSlider (screenRect : Rect, rgb : Color) : Color {
	rgb.r = GUI.HorizontalSlider (screenRect, rgb.r, 0.0, 1.0);
	screenRect.y += 20; // <- Move the next control down a bit to avoid overlapping
	rgb.g = GUI.HorizontalSlider (screenRect, rgb.g, 0.0, 1.0);
	screenRect.y += 20; // <- Move the next control down a bit to avoid overlapping
	rgb.b = GUI.HorizontalSlider (screenRect, rgb.b, 0.0, 1.0);
	return rgb;
}
다른Compound 컨트롤 안에서 어떻게Compound 컨트롤이 사용될 수 있는지를 보여주기 위해서 각각의 위에Compound 컨트롤들을 만들어 봅니다. 이것을 하기 위해서 우리는 위에 것같은 RGB 슬라이더를 생성할 것입니다. 그러나 우리는 그렇게 하기 위해서LabelSlider를 사용할 것입니다. 이 방법으로 우리는 각 색상에 해당하는 슬라이더가 어떤 것인지를 우리에게 이야기 해주는 레이블을 항상 가질 것입니다.
/* RGB Label Slider Compound Control */

var myColor : Color;

function OnGUI () {
	myColor = RGBLabelSlider (Rect (10,10,200,20), myColor);
}

function RGBLabelSlider (screenRect : Rect, rgb : Color) : Color {
	rgb.r = CompoundControls.LabelSlider (screenRect, rgb.r, 1.0, "Red");
	screenRect.y += 20; // <- Move the next control down a bit to avoid overlapping
	rgb.g = CompoundControls.LabelSlider (screenRect, rgb.g, 1.0, "Green");
	screenRect.y += 20; // <- Move the next control down a bit to avoid overlapping
	rgb.b = CompoundControls.LabelSlider (screenRect, rgb.b, 1.0, "Blue");
	return rgb;
}

위의 예제에서 생성된 Compound RGB Label Slider
- 출처: 유니티코리아위키 (CC BY-NC-SA 2.0)

